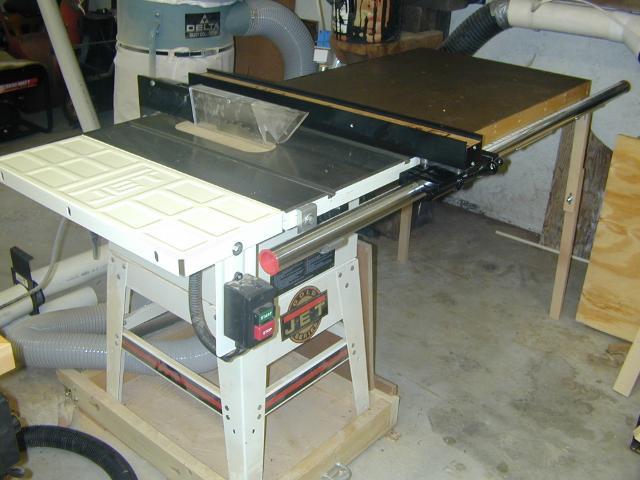
Utility Fence

I had some birthday money burning a hole in my pocket and I wasn't all that happy
with my stock Jet fence, so I decided to upgrade. It didn't help that Woodworkers
Warehouse was having a 10% off sale and Redmond
Machinery had some great prices on some scratch and dent Biesemeyer Fences.
I also wanted to make an outfeed table and I thought I should have my new fence
before I embarked on that project.
After much thought and back and forth trying to decide on either the Beisemeyer
50" HomeShop or the Vega, I decided on the Vega. If I had my preference, I
would have liked the 40" model, but they stopped making that model a few years
ago. The 50" after the 10% off was $225.99, not a bad price.
The main attraction of the Vega over the Biesemeyer is the micro adjustment feature.
As you can see below, you spin a knurled wheel to adjust the fence.

The way it operators is that you unlock both levers and move your fence. Once you're
close, you lock the smaller lever pictured above, and adjust the wheel until you
have the right dimension. Then you just lock the main lever and you're ready to
go.
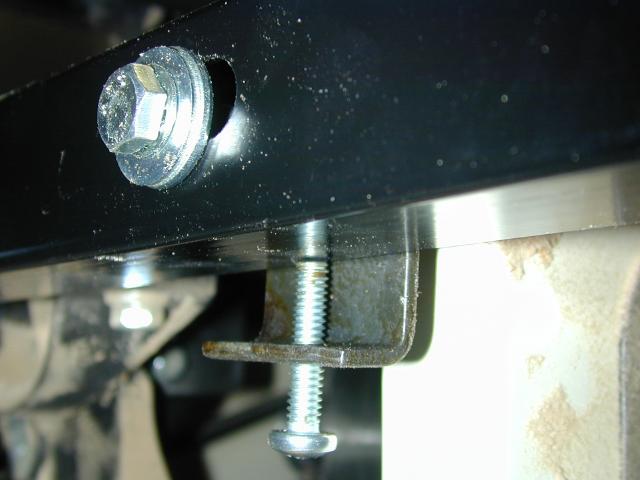
Below is a picture of the machined underside of the fence. The main locking mechanism
is the large lever which applies cam pressure to the brass strip. This brass strip
performs two functions. FIrst, it provides a brake which really grips the chrome
plated tube with very little pressure from the handle. Second, and I'm guessing
at this, it protects the rail from gouging damage caused by too much pressure on
the lever. Because the second lever isn't used to actually hold the fence during
cutting and because you can't get much leverage with the small handle, they don't
use the brass strip on the adjustment lever.

Installation:
Installation of the fence was a snap. The fence comes in one box. It's packaged
well with 2x4's and styrofoam in all the right places. Absolutely the only complaint
I have about the whole process is that the supplied hardware was too long for attaching
the front hangers on my Jet so I had to find some shorter bolts.
Once you remove your old fence basically all you have left to do is install 4 brackets.
Vega includes a unique adjuster which makes adjusting and aligning the rails a 30
second job.
Below you can see one of the hangers for the front rail. It consists of 2 pieces.
The actual hanger is the thick aluminum piece and the adjuster is the steel angle
bracket with the screw mounted behind it.

Basically all you do is screw the two pieces into the table top, and then use the
adjustment screw to set the top of the aluminum bracket to 1/8" below the table
surface. I just set a small steel adjustable square on the table with the rule hanging
off the edge 1/8", and adjusted the bracket until it just touched.
It's basically the same process for the rear rail.
Once the rails are on, you assemble the fence, and position it on the rails. Then
loosen the 4 hex head bolts with the included allen wrench and align the fence to
the blade.

Once the fence is aligned and the bolts tightened, you can install the rear hold
down. Again it's simple. You drill 2 11/16 holes and screw the bracket onto the
underside of the fence.

And that's it, the fence is installed. It shouldn't take you more than an hour.
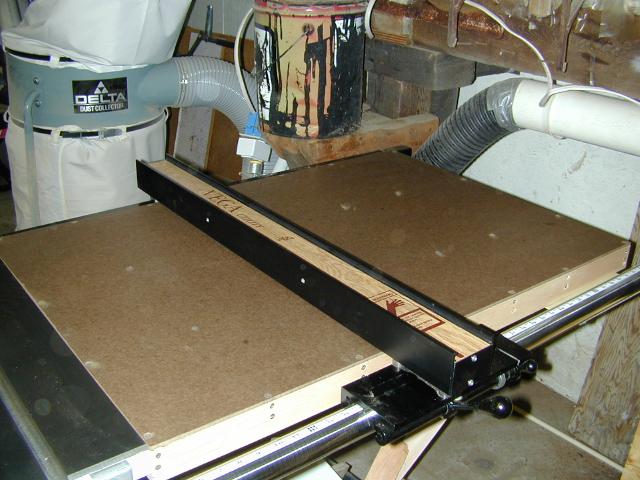
Because the rails allow for a 50" rip, they stick out quite a bit on the right
side. I am going to make legs to stabilize things and I'll add the pics once I'm
through. Additionally I'm going to add a right side table. This will be very easy
since Vega includes 4 metal pads to attach your table to
Ok, I just added the table. I decided on a light frame table. I used yellow birch
for the frame and a piece of 1/4" hardboard for the top. Here's the frame.
You actually have to make the front frame piece larger than the rear because of
the difference in size between the round tube and the rear square tube. Table thickness
at the front is around 2.75" while the rear is 1.75".

You must be careful so that you dont spread the rails at all when you attach the
table as this
will cause the fence to lose it's accuracy when extended.
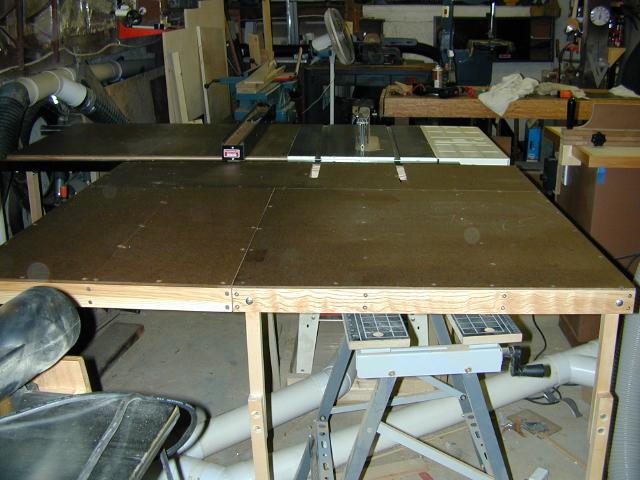
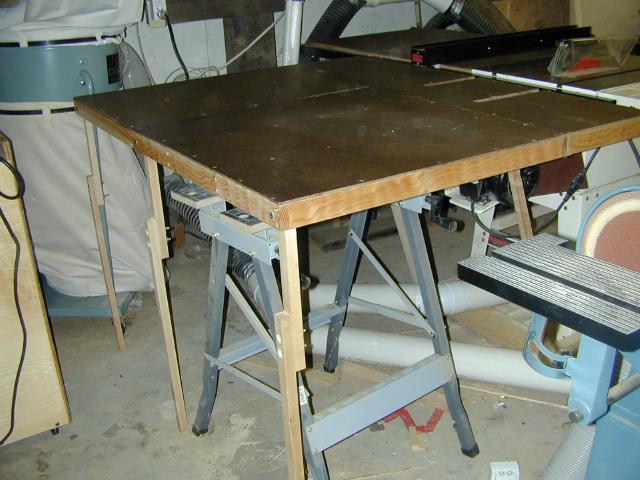
Here's a couple of shots of the table with the hardboard installed. It's quite sturdy.
I have made a pair of adjustable legs for the far end of the table. While it's not
needed if I stay under 30" rip it will tip the table if you put weight on the
far end. They have transformed the extension table into a usable work/assembly surface.
Now it's days later and I just added the outfeed table
I used a piano hinge so it could fold down if needed.
To attach the extension, I removed the inboard pad from the front rail of the saw..it wasn't needed. I then mounted it to the rear rail all the way to the left and installed it with the long dimension extending out. I took the inboard rear pad and just reversed it so the pad was extending away from the saw. I then attached the table to the pads leaving room for the fence to slide.
Again the table construction is oak frame with 1/4" tempered hardboard. It's light and very strong.
I've used the fence for a few projects and it works great. No more "bumping" the fence to make a fine adjustment, I just rotate the micro adjuster.
As far are repeatability, the Vega rates high. Even after bumping the far end of the fence on more than one occasion with a sheet of 3/4 plywood, the fence has stayed true.
I've added a sacrificial fence when needed but normally just use it without one.
Bill Esposito
06/11/02
Updated 02/01/2003
Copyright © 2002 , Bill Esposito.
All Rights Reserved.
[back]