and Storage
I Just recently bought the Bosch 3915 SCMS to replace my Harbor Freight $99 SCMS
and it wouldn't fit in the same place as the HF saw so I needed to do
something.
I just happened to watch Norm and he had a two part show on building a CMS
station and storage. I liked the cabinets and decided that I would try to build
something like that. I needed the storage and I thought it would be great to get
all my tools out of the sawdust.
I watched the show a few more times and then sketched out my design. The big difference
was going to be the saw station because the SCMS has a whole different set of mounting
requirements. The SCMS is much bigger than a CMS and just the opposite from Norms
design, needs to be mounted towards the front edge of the bench to provide enough
room for the slider, not the rear like an CMS
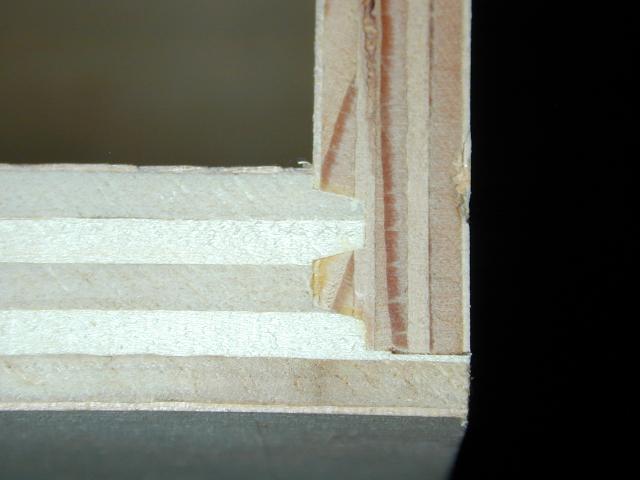
The Mistake. I made one huge mistake when I built this. I cheaped out on the carcass
and used some flooring T&G plywood. I had used it before and in general it does
have one good side and is worth the 15 bucks a sheet...but not when you plan on
attaching the slides directly to the carcass. This plywood was not flat and that
proved to be a problem in making it square and getting all the drawers to work properly...I
did get everything aligned and working but someday when I have some spare time,
I'm going to rebuild the carcass with 3/4 birch plywood.
If you don't wish to read this you can go directly to all the pictures of the Miter
Station construction by clicking here
Construction:
The carcass construction is pretty simple, each cabinet carcass (final dimensions
is 48x28x31.5H) is constructed of 3 pieces of plywood. The two ends are 28x31.5"
in size while the center piece is 27.25x31.5". The outer pieces have a .75"
deep rabbet along the top, back, and bottom while the center piece has .75"
notches cut along the top, back, and bottom to accept the cleats.
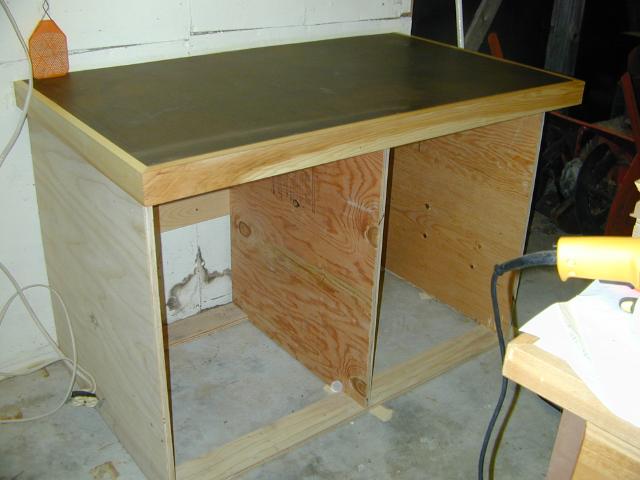
I don't know why but for some reason I forgot to take pictures of the cabinet top
construction so I'll try to describe it.
Just like Norm's version, I made the frame for the tops using 2x4's laying on their
side and joined with a half lap. Each top's frame is 50"x29" with a brace
down the center. I then attached a piece of 3/4 plywood on top of that with the
final layer a piece of 1/4 tempered hardboard. I edged it with hickory.
Before I attached the hardboard I screwed the top to the carcass and the wall cleat.
This makes for a very solid top.
Drawers:
I wanted to be able to store all my tools in this cabinet so the next thing was
to figure out what size the drawers should be. With the 28" deep cabinet I
used 26" full extension
slides made all the drawers 24" long (economy of material, 26" would
have taken another sheet of ply). I ended up with 4 drawers that were 12" deep,
2 at 10", 2 at 8", 4 at 5" and 2 at 6" for a total of 14 drawers.
Norm used dovetails to make his front joints but I don't own a jig so I decided
on a draw lock joint. I purchased a bit from WoodWorkers Warehouse and it worked
out fine.
The drawers are all birch plywood construction. The front is 3/4, and all the sides
and bottoms are 1/2". Remember these drawers are going to be carrying allot
of weight so make sure you use 1/2" bottoms. I attached a 3/4 birch ply false
front to all the drawers.
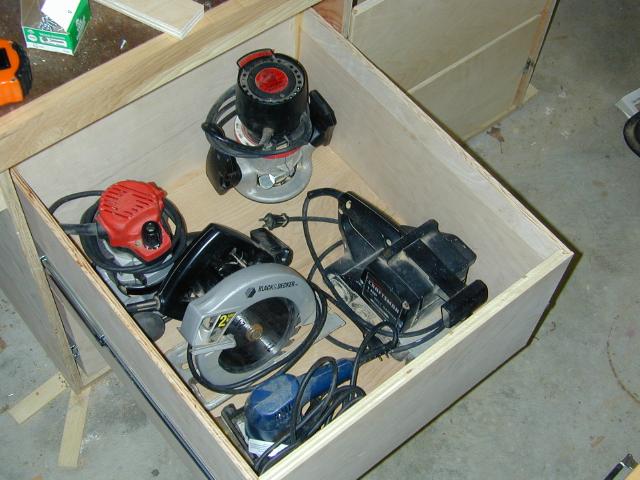
Like I said earlier, mounting the drawers was quite a pain but I got it done. In
this pic you can see that even though the upper 12" deep drawer has 2 routers,
a skillsaw, belt sander and biscuit joiner in there, there is no sag when fully
extended.
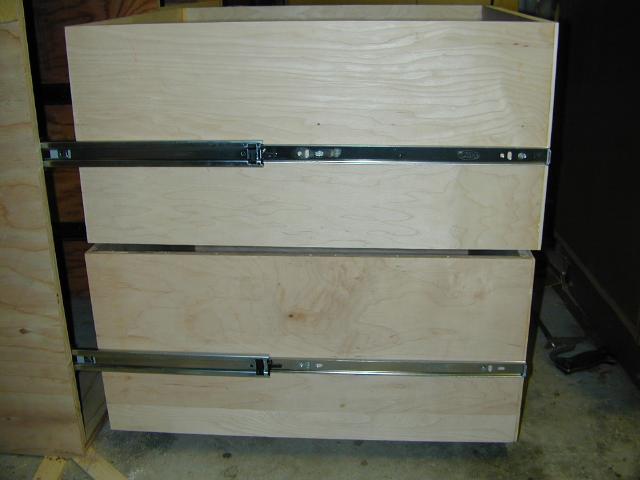
And here's a shot with all the drawers installed but before the false front were
added

The Miter Shelf:
Now to the real reason for building this, a place to mount my saw. I determined
the dimensions for the cabinets and top based on my saw's requirements. The Bosch
requires 30" from the most forward part of the table base used for mounting
to the rearmost part of the slider when fully pushed back. The Bosch still extends
about 10" more forward if you measure to the tip of the tables miter adjustment
handle. I certainly didn't want a 40" deep bench so I had to come up with a
workable design which would allow me room to use the saw, and then also allow me
to stow the saw when not in use so I wouldn't have that handle sticking out past
the bench.
What I came up with was a sliding shelf. First I mounted a fixed shelf at the correct
height so that when completed, the SCMS table would be the same height as the cabinet
benchtops. I then cut a piece of birch ply sized to fit the mounting base of the
saw, and the distance between the two cabinets. It turned out to be about 30"x15".
I mounted the saw to that piece of plywood and sat it on the shelf. I pulled the
saw base forward until it allowed for full retraction of the slider. I now had the
working position and the base only overhung the fixed shelf by a couple of inches.

I then devised a stop/cinch mechanism which would not only stop the saw from moving
any more forward, but would also wedge the sliding shelf and lock it in position.
Pretty simple really, just a couple of hardwood blocks cut at a 60 deg angle

And locked

I thought about using some UHMW tape under the sliding shelf and on the fixed shelf
but at least for now, the fit is just right and provides the correct amount of friction
to make everything solid. Come spring I may find that things get too tight and I
may have to shave things a bit and add the tape, we'll see.
Ok, so here's a pic with the drawer fronts installed and the saw pushed back to
the stowed position. Notice that the handle is out of the way.

Dust Collection:
Anyone who has owned a Bosch 3915 SCMS knows that it's one fault is that it shoots
dust everywhere. My design includes an adjustable Dust box and a deflector which
helps deflect more dust to the back of the saw rather than letting it deflect back
into your face. I had to make the box with adjustable sides, which I accomplished
with piano hinges, to accommodate the full swing of the miter. In retrospect, I should
have just made the miter shelf wide enough to accomadate that entire swing, and
then sized the dust box accordingly.


Ok, now the deflectors. When the above pics were taken I hadn't finished with the
deflectors, here they are now.
First, the single biggest problem is that mass of a housing right behind the blade
where the slide tubes run through. What happens is that the dust shoots straight
back, hits the vertical wall, and bounces back in your face and all over.
So the biggest improvement is gained by making a simple deflector. Size it so that
it fits in that area behind the blade which is not machined.

Here's a blades-eye view

And a couple of more views.


I used double stick carpet tape to stick the deflector to the table.

The next deflector is still in it's cardboard stage. What this does is keep the
dust low so it can be sucked up by the DC.
You may have to adjust this one to fit your design, but make the first deflector
as shown.


All in all I'm very happy with the way this project came out. Now I just need to
buy more tools so I can fill up all those drawers.
***UPDATE*** 11 Jul 2010
I've gotten a few email asking how I like the miter station and what would I change so I've decided to update this article with a photo and response.
I'm quite happy with the bench. I've got most of the drawers stuff with tools and stuff. There's actually nothing about this project that I would change except maybe making the carcass out of some higher quality plywood (ie. more flat) the bench tops have served me well when they're not loaded with stuff.
The miter shelf has also worked out very well and I haven't found the need to modify it al all though admittedly my SCMS heavily used.
So here's the slightly worn Miter Station today.

20 January 2003/ 11 Jul 2010
Copyright © 2003-2010 , Bill Esposito
All Rights Reserved.