7 March 2007
Click on pictures to enlarge
Click on pictures to enlarge
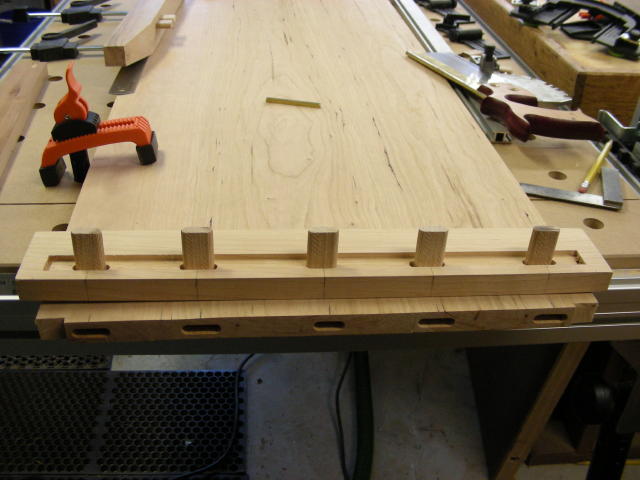
 I
finally got around to making a coffee table to match he pair of
end tables I made for my middle daughter last
year. The big difference with this table was that I was departing from
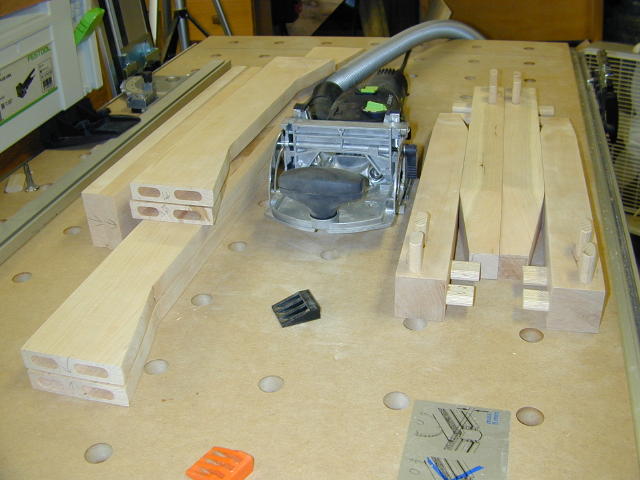
integral tenons to loose tenons. To that end I used the new
Festool Domino system to make the
mortises and tenons for the project. The picture at left (click to
enlarge) is of the apron and leg pieces with mortises and a few Domino
tenons set in place. In contrast to integral tenons, the photo at right
shoes the same pieces for the end tables with integral tenons.
I
finally got around to making a coffee table to match he pair of
end tables I made for my middle daughter last
year. The big difference with this table was that I was departing from
integral tenons to loose tenons. To that end I used the new
Festool Domino system to make the
mortises and tenons for the project. The picture at left (click to
enlarge) is of the apron and leg pieces with mortises and a few Domino
tenons set in place. In contrast to integral tenons, the photo at right
shoes the same pieces for the end tables with integral tenons.

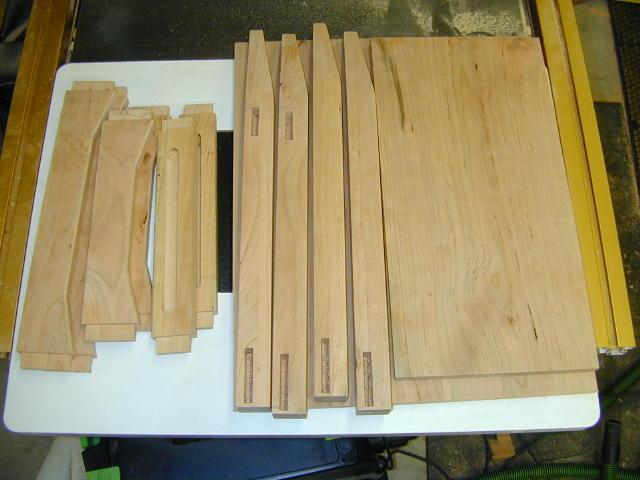
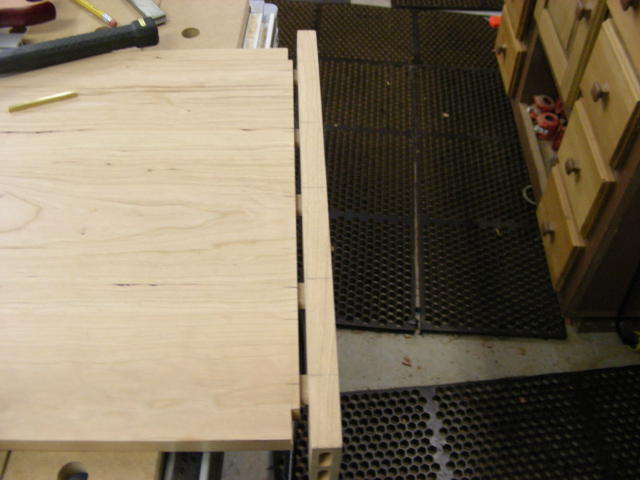
The beauty of the Domino is that there is no fine tuning of the joints.
Here's the first dry fit. Everything went together perfectly. As
long as you are not sloppy when laying out your marks or when lining up the
Domino on the mark it will all fit great. Of course square ends on your
aprons helps a lot as well.
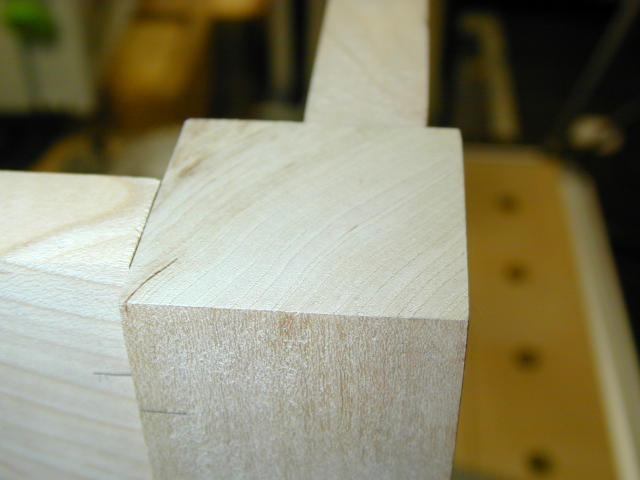
I
decided to try attaching the shelf with Domino tenons. In the past I just
dado'ed the stretcher and pinned the shelf in the middle. This time I
added the tenons. The only tenon which was glued in place on both the
shelf and the stretcher was the middle one. All the rest were mortised
wide and the tenon allowed to float.
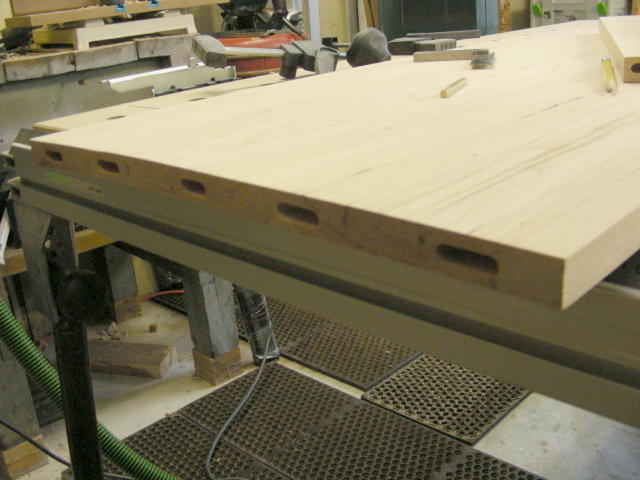
 Another
look at the shelf as I was dry fitting (left). Notches in the shelf are
there to hide the ends of the stopped dado and allow for expansion movement of
the shelf.
Another
look at the shelf as I was dry fitting (left). Notches in the shelf are
there to hide the ends of the stopped dado and allow for expansion movement of
the shelf.
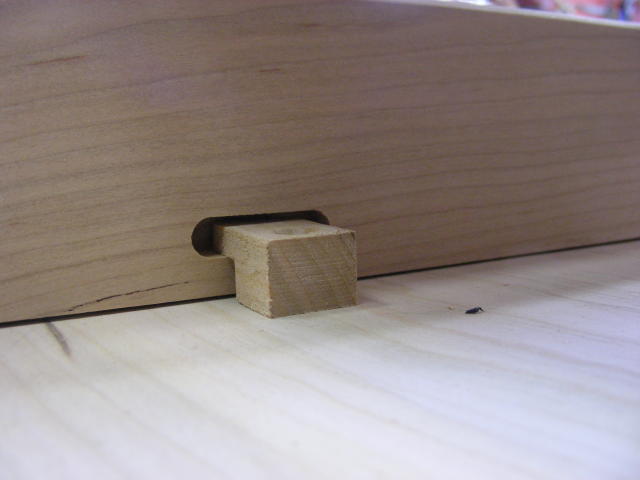
The pic at right shows how I attach the table top to the frame. I used the Domino to create mortises around the apron and I made the "buttons" from scrap cherry. They are screwed into the table top and secure the top while still allowing for movement..


Here are a couple of shot of the table glued up and ready for finish.
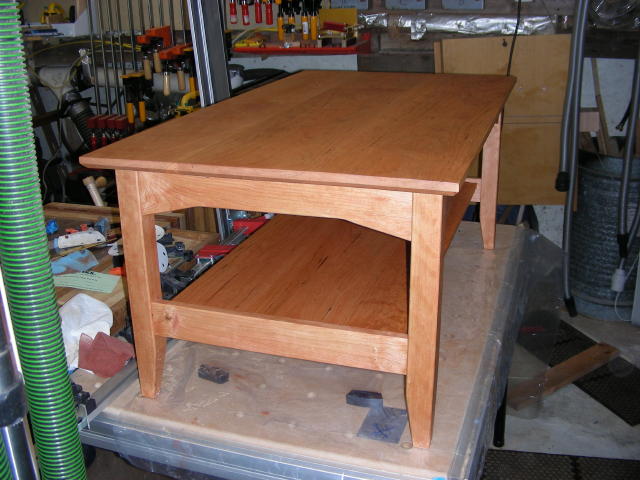
This picture shows the table after the color and oil have been applied. I flood the surface with Watco Natural Danish Oil to pop the grain then I use Watco Cherry Danish Oil to add a little color by wiping it on sparingly and wiping it right off. Then I flood the surface again with Watco Natural Danish Oil to even out the color.
Because it is winter and has been at or below 0°F for the last month this table has not seen any sun. Normally I'd give it a few afternoons in the sun to speed the darkening process.


This table had to match the previous end tables I've made, which I finished with a top coat of Minwax Wipe on Poly. I have since changed my top coat to Waterlox Original Sealer because I like the darker amber color (it is a phenolic based varnish) it imparts on the wood.
I wiped on 4 coats of the poly on the legs and apron, lightly
sanding in between coats with 400g paper and finished up with 1500 grit to knock
off any dust. The top got 7 coats and then was buffed with my Festool
Rotex 125 using a hard pad and some Tripoli buffing compound. Then
finished with a coat and buffing of paste wax.
Copyright © 2007, Bill Esposito.
All Rights Reserved.
[back]