
Do It Yourself
Vacuum Chuck
by
20 Feb 2006
There's no need to spend a lot of money on a vacuum chuck system. Following these instructions you can make your own for under $300.
Here's a lost of materials and sources of supply:
EZ Vacuum Adapter Kit Packard Woodworks $82.95 \ I used the EZ Adapter but the HoldFast is of the same style
- or HoldFast Vacuum Adapter Woodturners Catalog * $56.99 / You need one or the other not both.
Gast Vacuum Pump (220v) Surplus Center $59.95 Surplus Center is out of stock on these and no idea if/when they will get more
Alternate - Veneer Supplies Thomas Rebuilt pump $119 on sale This is an oilless piston pump but reviews say it is quiet and works well
10" MDF Base Plate cat # 329-0500 Woodturners Catalog $ 2.99
3", 4" and 6" Sched 40 pipe couplers Home Depot ~$12.00
1' of 3", 4", and 6" Sched 40 pipe
Home Depot
~$5.00
Cloth covered foam Mouse Pad
Dollar Store
~$2.00
Gauge Kit Packard Woodworks * $92.99
* Items available at both Packard Woodworks and Woodturners Catalog
Chuck Face Plate
 Cut
the base plate round, mount it on a face plate (leave it there). Mount it on the
lathe and true it up. Then drill a 1" hole in the center.
Cut
the base plate round, mount it on a face plate (leave it there). Mount it on the
lathe and true it up. Then drill a 1" hole in the center.
You may size the base plate just wider than the largest cylinder you plan to use. I left this plate large in case I decide to modify it to also serve as a compression chuck.
Be mindful of the length of the mounting screws. The base plate I suggest you purchase is 1" thick. We will be cutting some 1/4" groves on the face side of the plate so make sure the screws are sized appropriately so as not to dull your cutting tool.
To buy the base plate, click on the link provided. The actual link is dead but the product can be ordered by entering the catalog number in the "Quick Shopper" entry block on the upper left of the Craft Supplies (Woodturners Catalog) web page.
 Use
your parting tool and make a 1/4" deep groove in the base plate for each coupler
size.
Use
your parting tool and make a 1/4" deep groove in the base plate for each coupler
size.
In this picture I cut 2 grooves one for the 3" and one for the 4" cylinder.
What I did was first roughly mark the position of the cylinder. Then using a pencil with the lathe rotating, I marked, and then tested for fit, the circle layout until I got it right. Then using the parting tool I cut the groove.
Originally I tried using a gasket for the 3" groove but I've since found that it isn't needed.
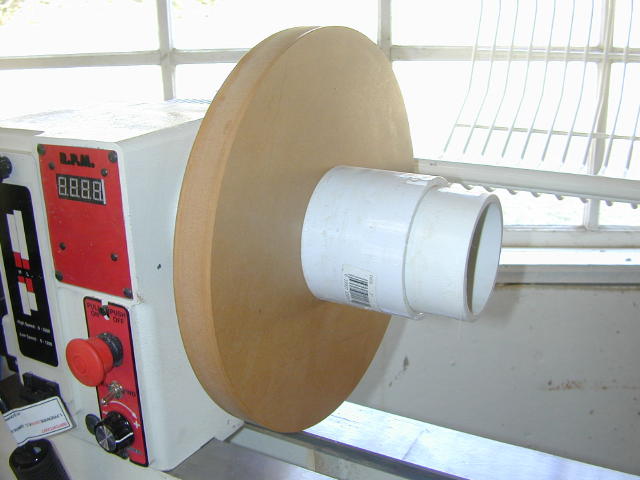 That's
it. make sure the couplers fit snuggly. In this pic you see the 4" coupler with
a 4" piece of pipe inserted as an extender.
That's
it. make sure the couplers fit snuggly. In this pic you see the 4" coupler with
a 4" piece of pipe inserted as an extender.
I used a Wipe-on Poly to seal the MDF base plate.
For gasket material, take one of those cheap mouse pads and peal the cloth covering off it. Use the neoprene pad for the gasket at the bowl side. I just cut a hole in the center of the pad. Place it over the end of the coupler and then place the bowl against that.
Vacuum Pump

The Link I provided above is for a 220v pump. If you have 220v available
this is about the cheapest you'll find for a new pump. These pumps retail
for about $350 usually so $90 is a great price. If you don't have 220v try
Ebay. You can often find a 120v pump for about $75. Just make sure
you get a continuous duty pump. You'll also need a valve, a gauge, and a piece
of hose. If you can get that locally,
get this gauge kit.

You're also need an intake filter for your vac pump. If your pump didn't come with one they are pretty easy to make. Just get some PVC pipe and end caps and two nipples which can be threaded into the pipe and connected to a length of air hose. I bought the hose at Home Depot. I just selected the shortest length I could buy.
Glue one end cap on. Fill the pipe with aquarium filter floss (polyester) and glue the other end cap on. Tap a hole into each end of the filter and thread in the nipples.
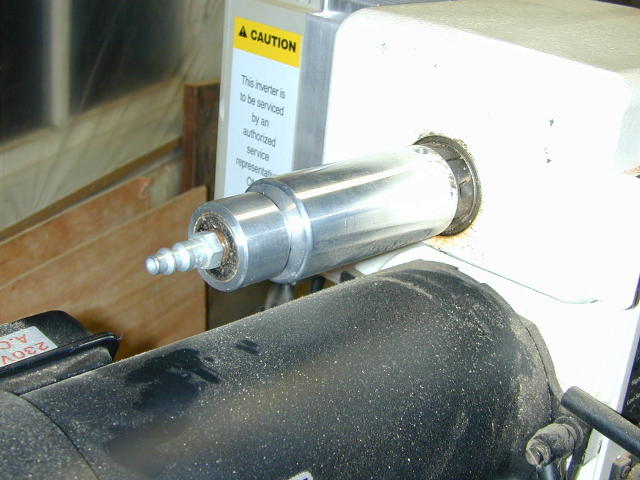
In this pic the filter is attached in line between the gauge kit and the vacuum pump
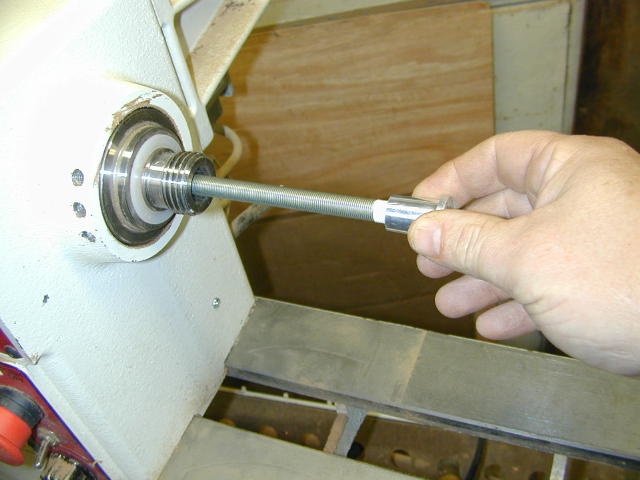 The
last thing you'll need to do is trim the threaded pipe of the
EZ Adapter.
Just follow the included instructions. Screw the intake piece on to the
rod and
insert the rod through the arbor (left). Trim off the excess rod and screw
on the rotary adapter (right).
The
last thing you'll need to do is trim the threaded pipe of the
EZ Adapter.
Just follow the included instructions. Screw the intake piece on to the
rod and
insert the rod through the arbor (left). Trim off the excess rod and screw
on the rotary adapter (right).
If you don't use a Morse taper spur center,
the EZ Adapter can be left in place as chucks and faceplates can be used with it
installed. I take mine off when I'm done because I often use a spur
center. If you leave it installed, just disconnect the vacuum line when
not in use so you don't wear the bearing.
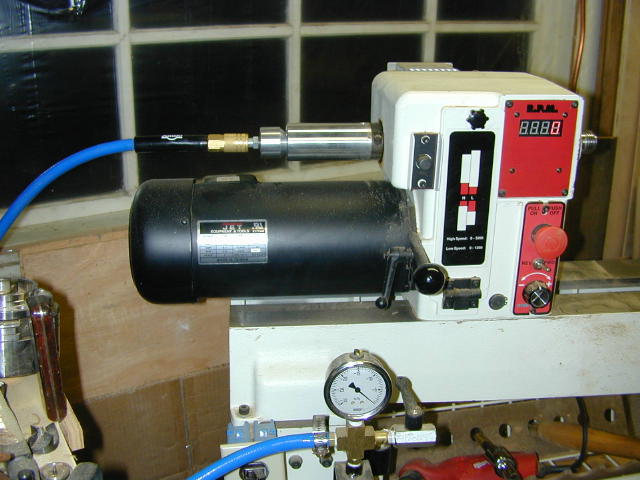
 After
some experimenting with location, I
mounted the gauge kit right on my lathe as well as a switched outlet where I
plug the pump into. This provides me with easy access to both power and
suction control which is especially useful when you're trying to initially
position the piece. My pump is 120v by the way and is not the exact same
one I refer to in my links. I purchased mine off Ebay.
After
some experimenting with location, I
mounted the gauge kit right on my lathe as well as a switched outlet where I
plug the pump into. This provides me with easy access to both power and
suction control which is especially useful when you're trying to initially
position the piece. My pump is 120v by the way and is not the exact same
one I refer to in my links. I purchased mine off Ebay.
Use:
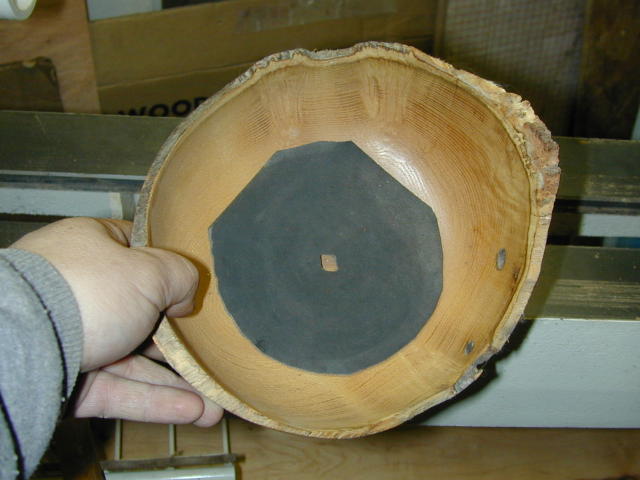

Lay the mouse pad with the hole in it on the bottom of the bowl to be chucked (left). Center the bowl on the cylinder using the tail center for added support and an aid to help find the center (right). You want to pull as close to 25 inHg as you can but be careful not to create more suction than your bowl can handle or you may break the bowl.


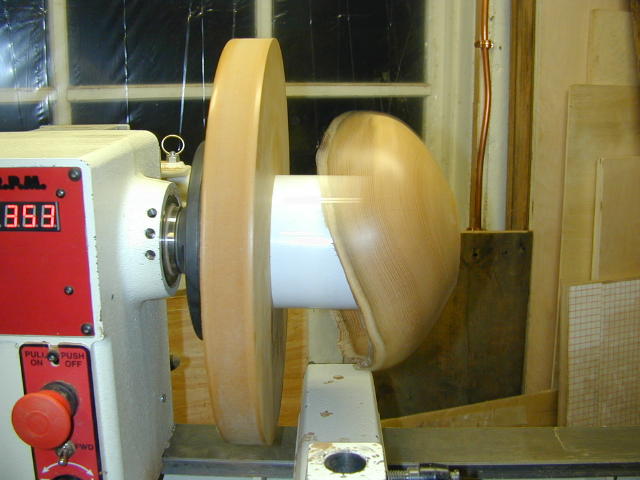
Once you've cut as much as you can with the tail center in place you can back if off and finish the bottom without it. Be very gentle as it doesn't take much to catch and launch the bowl into oblivion.
That's it, good luck.
back to Bill-e's Woodworking Page