
My first project was a router table. I wanted to build Norm's but was both afraid
of it's complexity and of the cost. I settled on a table designed by Joe
Johns and made some of my own modifications.
I chose this design because it would allow me to try out some of my woodworking
skills (or lack thereof) on something which would remain in the shop.
 The first thing I did was order some MDF from my local building supply...I had never
even seen MDF until I helped the driver bring two sheets of three quarter inch MDF
into the shop. I proceeded to layout the panels, and cut them with my circular saw.
Wow, I couldn't believe the amount of fine sawdust I was creating. In a matter of
a day, and one miscut, the carcass was finished. make sure you size the
router compartment for your router and don't just use the dimensions provided in
the plan.
The first thing I did was order some MDF from my local building supply...I had never
even seen MDF until I helped the driver bring two sheets of three quarter inch MDF
into the shop. I proceeded to layout the panels, and cut them with my circular saw.
Wow, I couldn't believe the amount of fine sawdust I was creating. In a matter of
a day, and one miscut, the carcass was finished. make sure you size the
router compartment for your router and don't just use the dimensions provided in
the plan.
Next came the top. I used contact cement to laminate the two pieces of MDF together.
Once that dried I laminated some matte finish laminate to both the top and bottom.
I now had a top which looked good, was flat, and weighed a ton.
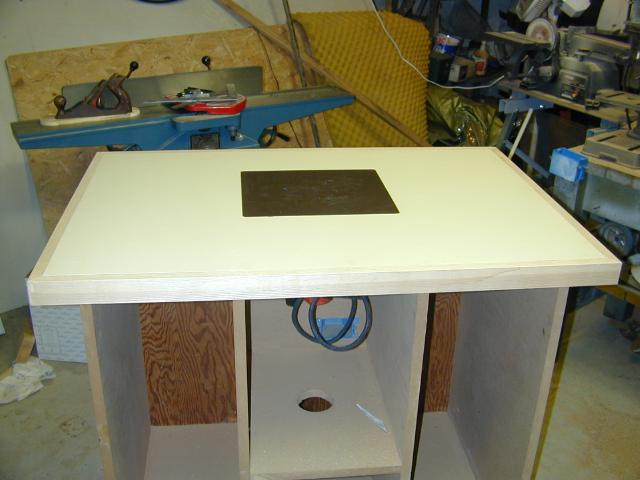 Since
I was going to use an insert, I needed to make the cutout for it. I used a
piece of 12x12x3/8" phenolic. To make a template, I laid the insert on the table
where I wanted it, then using MDF scraps and carpet tape, I surrounded the
insert with 2" wide strips of MDF. I now had an exact template for the insert.
To cut out the insert, I then placed the phenolic insert on top of the MDF
template, and adjusted my pattern cutting straight bit so that while resting on
the insert and the MDF template, the bottom of the cutter just touched the table
top. I now had the exact depth that I needed to cut the rabbet. While I had
already purchased a new Milwaukee router, I decided to use my old Craftsman
router for the job...Big mistake! About two thirds of the way around the
template, the bit began to drop. I was now, unknowingly, cutting a rabbet whose
depth was getting deeper as I went. I wont go into the repair now, but I did
repair it..and haven't used the Craftsman since. Here's some DIY instructions on
installing the insert.
Since
I was going to use an insert, I needed to make the cutout for it. I used a
piece of 12x12x3/8" phenolic. To make a template, I laid the insert on the table
where I wanted it, then using MDF scraps and carpet tape, I surrounded the
insert with 2" wide strips of MDF. I now had an exact template for the insert.
To cut out the insert, I then placed the phenolic insert on top of the MDF
template, and adjusted my pattern cutting straight bit so that while resting on
the insert and the MDF template, the bottom of the cutter just touched the table
top. I now had the exact depth that I needed to cut the rabbet. While I had
already purchased a new Milwaukee router, I decided to use my old Craftsman
router for the job...Big mistake! About two thirds of the way around the
template, the bit began to drop. I was now, unknowingly, cutting a rabbet whose
depth was getting deeper as I went. I wont go into the repair now, but I did
repair it..and haven't used the Craftsman since. Here's some DIY instructions on
installing the insert.
The next thing I did was buy some ash and edge the top. That came out pretty well and I flushed it up with an old bench plane.
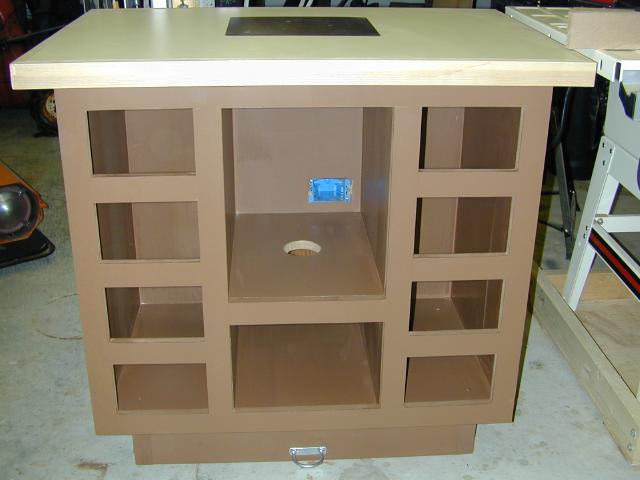 The next phase was the face frame. It went pretty easy and I cut and glued it up
in a couple of hours. Since I was a newbie when I made this the face frame
is simply butt glued MDF. 5 years later in my hot/cold/damp/dry shop it's
still in one piece.
The next phase was the face frame. It went pretty easy and I cut and glued it up
in a couple of hours. Since I was a newbie when I made this the face frame
is simply butt glued MDF. 5 years later in my hot/cold/damp/dry shop it's
still in one piece.
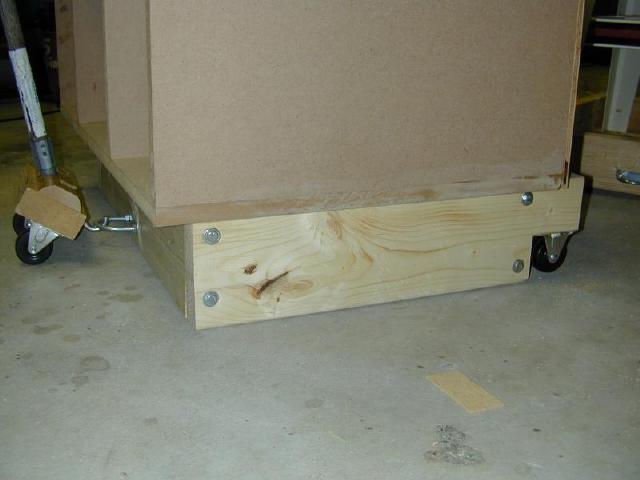
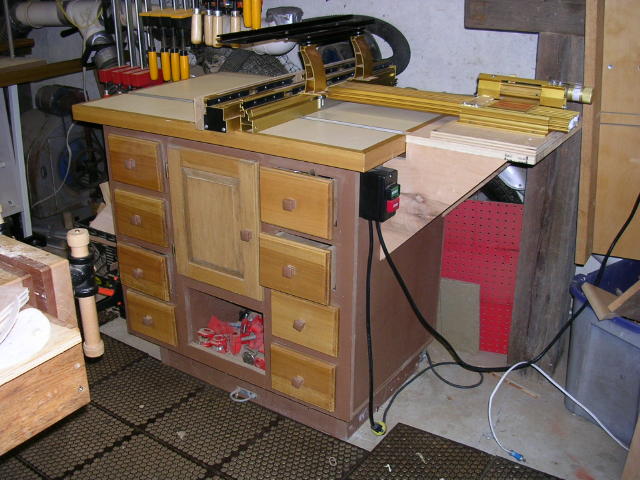
Before I get ahead of myself, one modification I did make was to modify the kick
plate. Following a design I got from ShopNotes, I used 2x6's for the cabinet base
so that it could be made mobile. In the photo at right you can see the
trolly used to move the table.
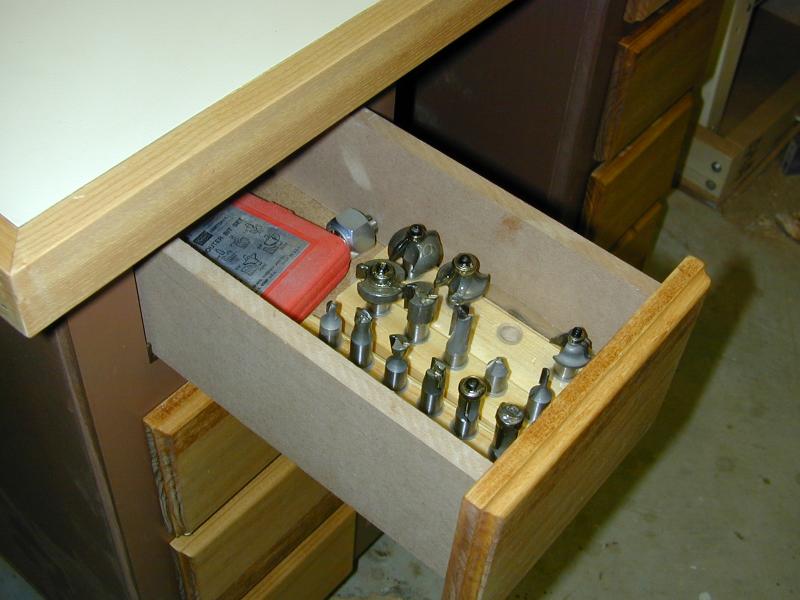 Once assembled, I painted the carcass with a acrylic latex paint, and began building
the drawers. The drawer construction is simple. Dado's in the sides for the back
and bottom and in the drawer front for the sides. I was going to try a sliding dovetail
but I was awaiting my router bits from MLCS and really needed the table to be finished
before attempting to cut the pin..so I opted for just the dado. The sides and back
are 1/2" MDF, bottom is 1/4" tempered hardboard, and the front is poplar.
I installed them utilizing a single under drawer runner from
Rockler which cost $5.95 each.
Once assembled, I painted the carcass with a acrylic latex paint, and began building
the drawers. The drawer construction is simple. Dado's in the sides for the back
and bottom and in the drawer front for the sides. I was going to try a sliding dovetail
but I was awaiting my router bits from MLCS and really needed the table to be finished
before attempting to cut the pin..so I opted for just the dado. The sides and back
are 1/2" MDF, bottom is 1/4" tempered hardboard, and the front is poplar.
I installed them utilizing a single under drawer runner from
Rockler which cost $5.95 each.
 With the drawers completed, it was time to start on the router compartment door.
I decided on attempting a raised panel. I accomplished this utilizing my Jet Contractors
saw and tenoning jig.
With the drawers completed, it was time to start on the router compartment door.
I decided on attempting a raised panel. I accomplished this utilizing my Jet Contractors
saw and tenoning jig.
The door came out pretty well although I inadvertently grabbed the wrong stain when
I finished it :)
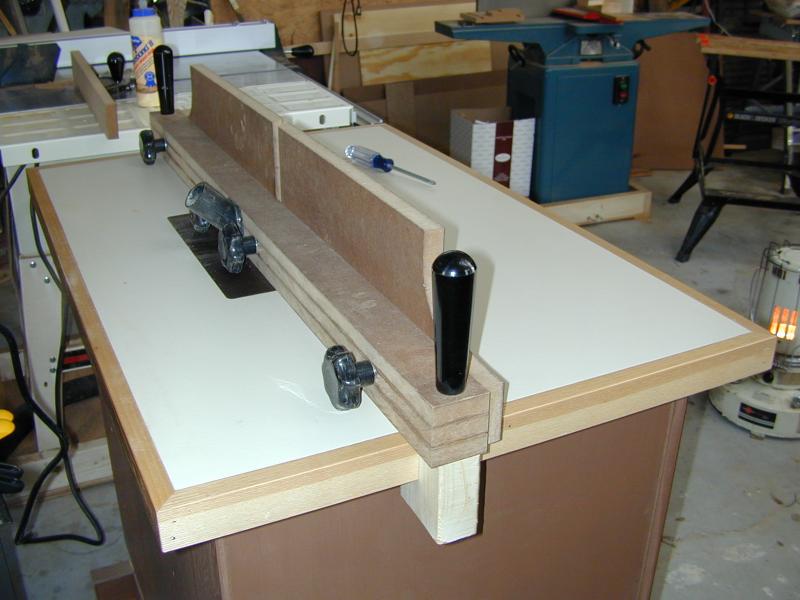 With the door on, I attached the top to the carcass with "L" brackets,
and began making the fence. I laminated three strips of MDF for the fence. I made
the tall, adjustable, sacrificial fence from MDF also and treated them with wipe-on
poly. The method of clamping is quite simple. an "L" shaped clamp made
from 2x4 and a carriage bolt and plastic handle. I've used it a couple of times
and it works just fine.
With the door on, I attached the top to the carcass with "L" brackets,
and began making the fence. I laminated three strips of MDF for the fence. I made
the tall, adjustable, sacrificial fence from MDF also and treated them with wipe-on
poly. The method of clamping is quite simple. an "L" shaped clamp made
from 2x4 and a carriage bolt and plastic handle. I've used it a couple of times
and it works just fine.
The final part of the project was adding the dust collection. Similar to Joe John's
plans, I added a 4" to 3" toilet flange and ran 3" PVC out the back.
From there a small 1.5" hose tee's off and runs up to the fence. When my DC-850
is running, it takes 2 hands to open the door on the router compartment, and the
work is held firmly on the table from the suction.
I should mention that for power, I installed an outlet box in the router compartment
which is where I plug in the router. I ran the power cord out the back of the table
and plug that into a speed control.
This table was fun to make, fairly easy, and very functional. I recommend the design
to anyone who would like something similar to the New Yankee Workshop table.
UPDATE Dec 10 2006
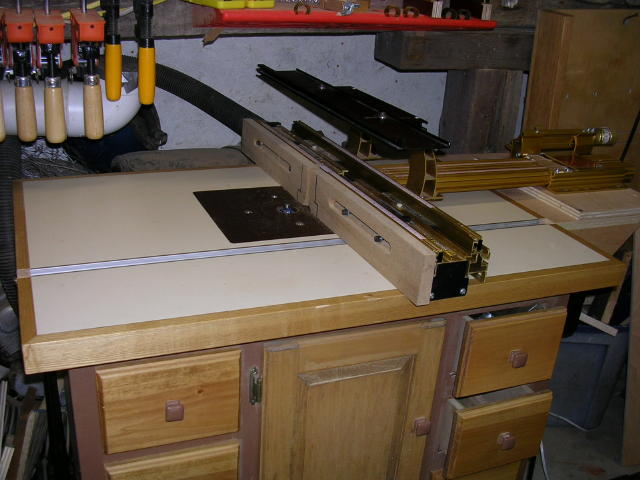 I've
been using the Incra Ultra 16 and Wonderfence for some time but it was always
just clamped to my table. This Incra setup is designed for 16" of travel
so joinery can be that long. My table wasn't design for the Incra and
since I put the Router insert in the middle of the table, I could never get more
than a few inches of travel. So rather than making a new top I used a
scrap pf 3/4 ply and made a table extension off the right side. It extends
the right half of the table by 12" and provides full travel for the jig.
I've
been using the Incra Ultra 16 and Wonderfence for some time but it was always
just clamped to my table. This Incra setup is designed for 16" of travel
so joinery can be that long. My table wasn't design for the Incra and
since I put the Router insert in the middle of the table, I could never get more
than a few inches of travel. So rather than making a new top I used a
scrap pf 3/4 ply and made a table extension off the right side. It extends
the right half of the table by 12" and provides full travel for the jig.
Bill Esposito
Copyright © 2002 , Bill Esposito.
All Rights Reserved.