European Style Bench
Well, just like most of you, my bench is usually so cluttered, I can't work on it.
I've tried cleaning it off, but it seems that within 5 minutes of starting to work,
it's cluttered again. I've been using my router table and tablesaw as assembly benches...that
had to stop. While watching The New Yankee Workshop one evening while eating supper,
I happened to catch an older episode where Norm builds an inexpensive knock-off
of a european-style workbench. It looked easy enough to build, so off I went to
the bookstore to pick up the first NYW book, which included the plans for the bench.
First step was to cut all the joinery, which was basically dados, rabbets, and half
laps. The frame is 2x4 and I was able to get all the pieces cut out of about six
eight footers. When I went to assemble it, I had one piece which didn't look like
anything in the plans..wait a minute, it looked like two different pieces. What
happened was I cut the right side dados looking at one figure, and the left side
looking at another. It was only 20 inches so that wasn't too much waste, I quickly
cut a new piece.
I wish I could say the same about the dog assembly. I did everything right. I laid
it out correctly, marked both pieces, and even x'd out all the waste and the direction
of the dados since I had to cut them at 86 degrees. After it was all marked and
looking pretty, I proceeded to bring the first half over to the table saw, flip
it marking side down, and cut the very first dado at 94 degrees instead of 86. After
making a few more mistakes on that particular board, it was scrapped.
Once all the 2x4's were cut I began assembly. Everything was glued and screwed with
2.5" sheetrock screws with the exception of the leg half laps on which I used
1.5" screws.

Once the frame was assembled, I began working on the top. I rough cut the top from
3/4" tongue and groove plywood flooring. I used the T&G because it had
a finished side which was better than plain CDX and it was a buck cheaper to boot.
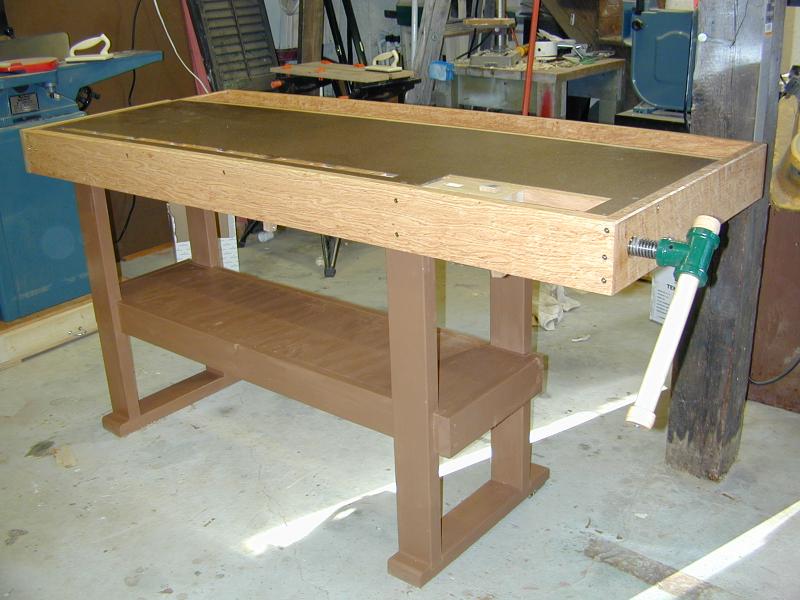
One mistake I made which was later covered with paint was that I installed the shelf
upside down so that the better side was down. (see above pic).
I finished trimmed the top using my table saw. Then just like Norm did, I attached
the hardboard top to the plywood, drew my layout lines for the dog cutout slot,
and plunged it down over the tablesaw blade and made the inner most cut. This worked
fine. Mistake #2 came with the second cut, which ended up making the slot 1/8"
too wide. I measured wrong and because I was plunging the cut, too much of the blade
had popped up through before I realized I was a blade's width off, so I finished
the cut. I then attached the top to the bench using 1.5" sheetrock screws.
Because I was awaiting my shoulder screw, I next made the dogs and added the hardwood
filler between the dog holes. As a result of my mistake, I could no longer just
cut 3/4" stock because the slot was 7/8's wide. So I had to cut the stock 7/8's
wide and shim it up by about 1/8" to get it flush. It worked and the mistake
is unnoticeable.
A week later I had my tail screw assembly which I bought from Lee
Valley and it was now time to make a trip to my local saw mill to buy some hardwood.
Ok, so I'm new at this and about the only thing I know about hardwood is that it's
hard and expensive. I went to the mill, Tommila Bros in Troy New Hampshire, on a
drizzly saturday morning. I first tried to see if I could find wood long enough
from the cut-off bins but as is my luck, there wasn't anything there long enough.
I did find a piece of white oak which I later used on my Harbor Freight vise and
a 1/5" wide piece of red oak which I used for the trim in the tool well. So
off to the full price racks. I was lucky to find a 4/4x10x8 of rough cut red oak.
Ok, $3/bf and that was enough for the edging. I also needed 12" of any 6/4
hardwood. You guessed it, nothin. I ended up with a 24" piece of 8/4x13 hard
rock maple. That piece cost me 16 bucks...yeach!
Back to the shop. First thing I did was to rip the red oak. Of course in rough cut,
10" can be anything between 9 and 10" and mine was closer to 9. I needed
the rips to finish out at a minimum of 4.5" and I did just barley get that.
Next was to joint one face flat so I could run the boards through the planer. Jointing
was kind of difficult since the boards, even ripped in half, were heavy. With judicious
placement of my Workmate and saw horses and things went easier. Once I had the one
side flat, it was off to the first use of my DeWalt 733 planer.
Planing the oak was uneventful but it did reveal a very figured wood. I almost hated
to use it on the bench. The background on this page is a picture of some of the
lighter figure, and the brightness has been increased to lighten up the color so
the text would show up better. In person, the wood is very red.
Next was the maple. First thing I had to do was trim it to 12.25" on the table
saw. The board was cupped quite a bit so it took many small passes to flatten the
top side. I ended up with the finished thickness of about 1.75. Not wanting to make
it any thinner since I wasn't using most of the wood, I cut off 12" to be used
for the dog assembly, and further planed that to the plan thickness.
I cut the dog dados and assembled and finished the two halves of the dog assembly
without incident.
It was now time to finish cutting the top to accept the dog assembly. This time
I plunge cut using my hand circular saw, and finished with a jig saw.
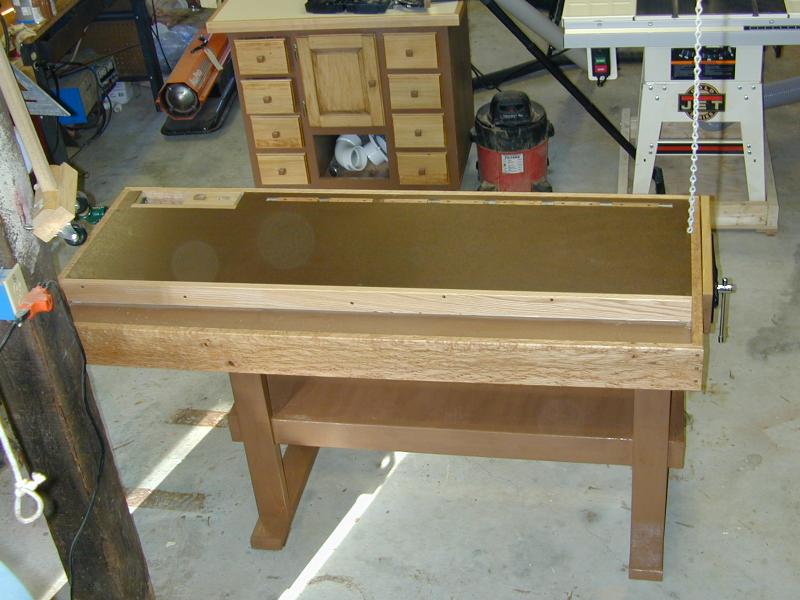
Next it was time to add the edging and the tool tray. Rather than picking up the
large piece that was remaining of the 3/4" plywood, I decided to use some 3/4"
MDF for the tool tray bottom, that worked just as well. I also expanded the width
of the tray by 2 inches, increasing the length of the end edges to 26".
I moved the Harbor Freight woodworkers vise to the opposite end from the shoulder
vise and mounted it. I now needed to mortise the back side of that end piece of
oak so that the board would fit over the inner jaw of the vise.

To accomplish that, I used my router and a hinge mortise bit. Once that was done,
I rabbeted the ends of the long edge pieces and attached them to the bench.
I then cut that piece of white oak I mentioned earlier and attached it to the outer
jaw of the vise.
With my attention now at the shoulder screw end, I cut a hole in that end using
a hole saw. This was to accept the shoulder screw threaded guide. The guide is inserted
through the end piece from the inside. I suppose it's designed to be mortised but
I just mounted it flush. Then I attached the end guide onto the dog assembly. I
had to trim the tip of the lower screw off so it wouldn't protrude into the dog
slot.
Ahh, almost finished. I completed assembly of the edging utilizing 2.5" deck
screws which are gold in color. I found them at...you know, WalMart. They look much
better than the normal black sheetrock screws.
Almost complete, I just needed to apply the finish. I elected to paint the frame
with the same acrylic latex paint I used on my router table cabinet. For the top
and edge, I applied many coats of wipe-on poly. It dries fast and no brush marks.
Well, that's it, the bench works and looks great.
 3/26/2004
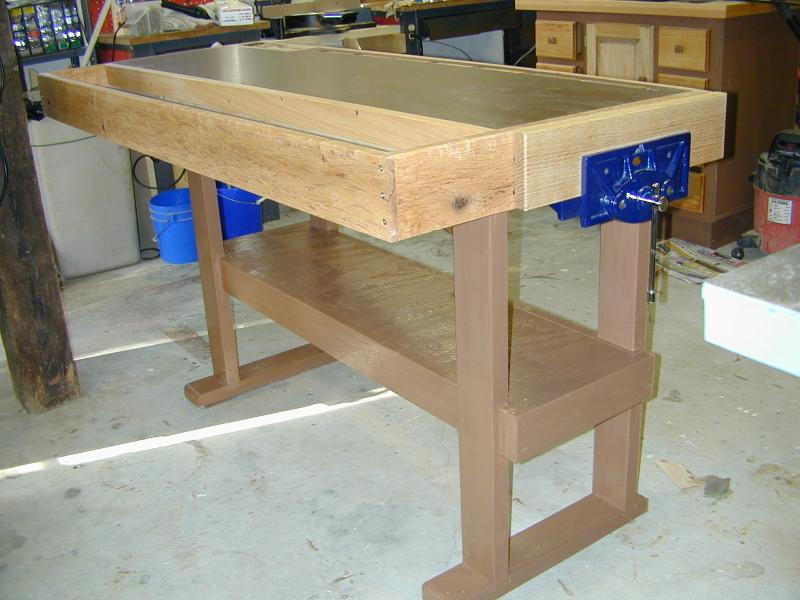
*UPDATE*
3/26/2004
*UPDATE*
I got rid of the cheapo HF vise and added a Veritas Twin Vise. What a pleasure
and what a difference. I love it
03/21/02
Copyright © 2002 , Bill Esposito.
All Rights Reserved.