If you've ever thought of what a pain in the butt it was to align the holes on your hook and loop sanding disks with the ones in your sanders pad, thin this DIY is for you. Basically it's just a piece of board (I used MDF) and some dowels.
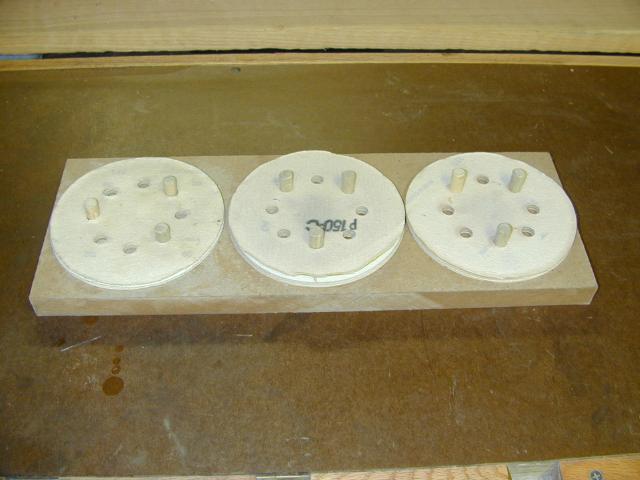
It can be sized for as many or as few different size disks. For mine, I made a place for 3 different size stacks.
Construction is easy. Just get a disk and lay it on the board. Use a pencil to trace out 3 of the holes on the disk and then move the disk to the next position and do the same thing. I just happened to have a 3/8" dowel so I chucked up a 3/8" bit in my drill press, set the depth so that I didn't drill all the way through the board, and drilled out all the holes.
I then took my bandsaw and cut up the dowels to a size which when inserted, would leave about 5/8" exposed. I ran the dowels on my belt sander to round over the edges. Then I inserted them into the holes. I didn't even need to use glue, just pounded them in with a mallet. That's it.
The holes in my 8 hole disks are about 3/8 so it seems like it's a tight fit over the dowels...but don't worry, the disks come right off once the sander is loaded.
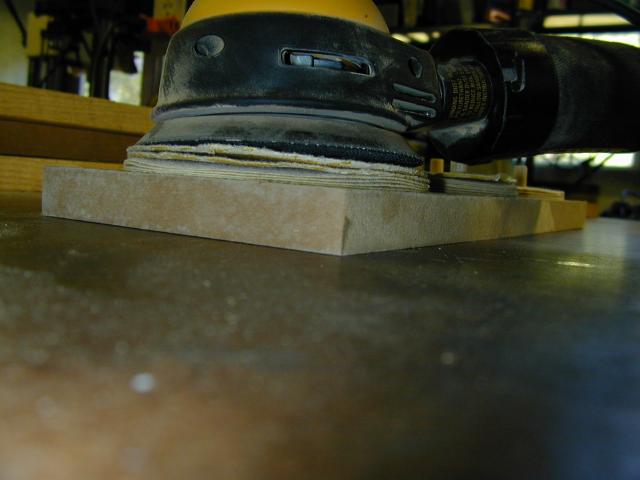
Here I tried to get a pic of the sander just coming in contact with the disk. Though you wouldn't think so at first, aligning the sander over the dowels is very easy and just takes a second.
The picture below shows me removing the sander and the disk from the server. Once it's free of the dowels, just press it to make sure it's firmly attached.
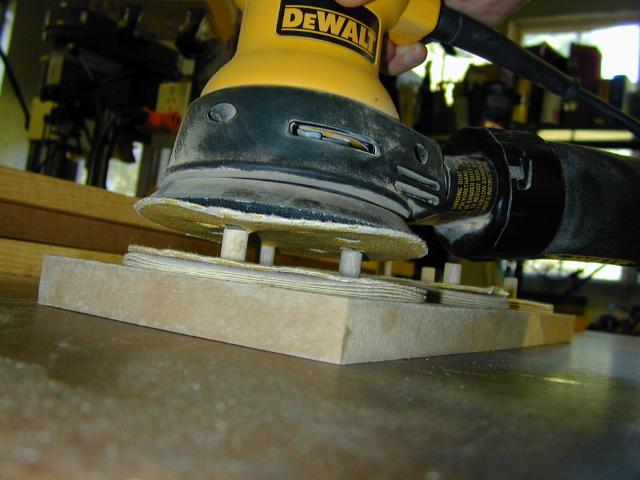
And lastly, a picture showing just how well it aligns the disk...perfectly.

This simple project takes only a few minutes to build and will save you from the frustrations of trying to align the sanding disks, then pulling them off and trying it again to get it aligned correctly.