
Delta Removable Splitter
for your
Jet JTAS-10 Cabinet Saw
by
1 Oct 2006
The Jet JTAS-10 Xacta saw is delivered with the same, difficult to remove OEM splitter that all Jet saws come with. While this splitter works it is not easy to install and remove and it cannot be used with an overhead guard/dust collector system. There are numerous aftermarket splitters which can be purchased but the most cost effective one is the splitter that Delta sells as part of their Unigaurd overarm guard system. This DIY article will provide you with instructions on how to install the Delta Removable Splitter (P/N 1349941) on your Jet JTAS-10 Xacta saw.
First thing you need to do is purchase the splitter. One vendor which has them in stock is The Saw Center in Springfield MA. They sell the Delta Removable Splitter (P/N 1349941 (left or right tilt) for $35.70 as of the date of this article.
 Ok,
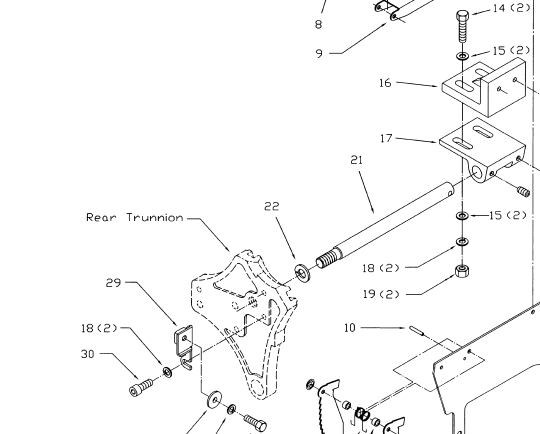
unplug your saw and remove the throat plate and blade. If you examine the
rear trunnion you will find the OEM blade guard bracket (item #29). Remove
it by removing the two hex head screws that hold it in. We wont need any
of these parts so bag them and store them away. While you're at it you can
remove item #21 and related guard/splitter pieces from the rear of the saw.
Ok,
unplug your saw and remove the throat plate and blade. If you examine the
rear trunnion you will find the OEM blade guard bracket (item #29). Remove
it by removing the two hex head screws that hold it in. We wont need any
of these parts so bag them and store them away. While you're at it you can
remove item #21 and related guard/splitter pieces from the rear of the saw.
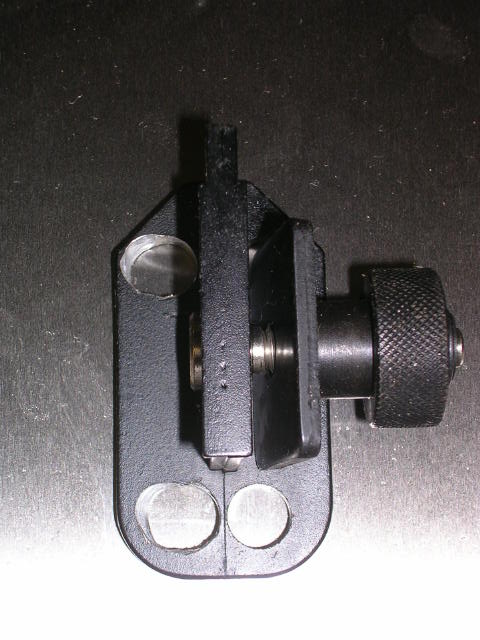 Remove
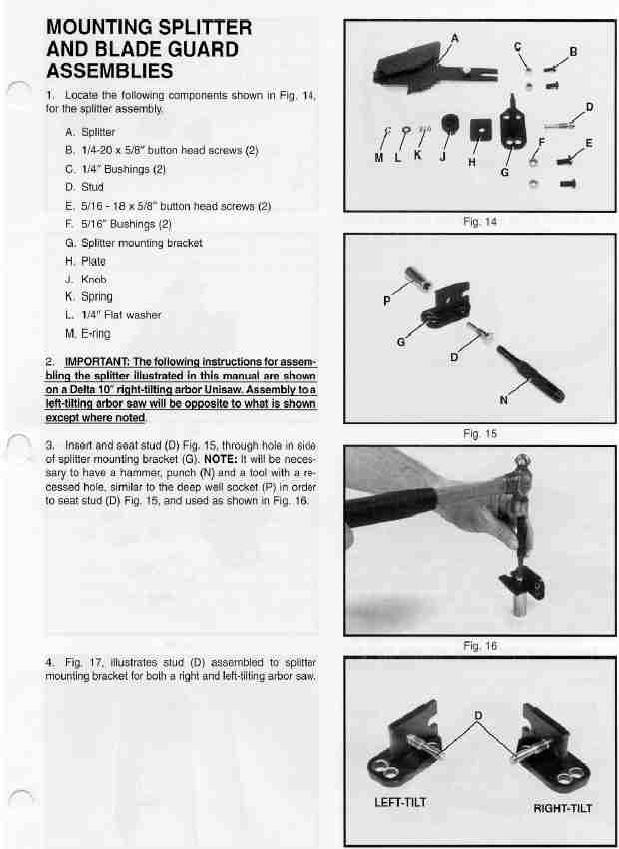
the Delta splitter parts from the box and take the bracket over to the drill
press. For a left tilt saw, you will need to horizontally elongate the two
mounting holes on the left side of the bracket. I assume that for a right
tilt saw, the two holes on the right are used but you'll have to check that out
to make sure. I didn't elongate them much and it proved t be enough to
align the splitter with the blade. The bracket also must be assembled at
this time. Follow the Delta instructions for a
left or right tilt saw.
Remove
the Delta splitter parts from the box and take the bracket over to the drill
press. For a left tilt saw, you will need to horizontally elongate the two
mounting holes on the left side of the bracket. I assume that for a right
tilt saw, the two holes on the right are used but you'll have to check that out
to make sure. I didn't elongate them much and it proved t be enough to
align the splitter with the blade. The bracket also must be assembled at
this time. Follow the Delta instructions for a
left or right tilt saw.
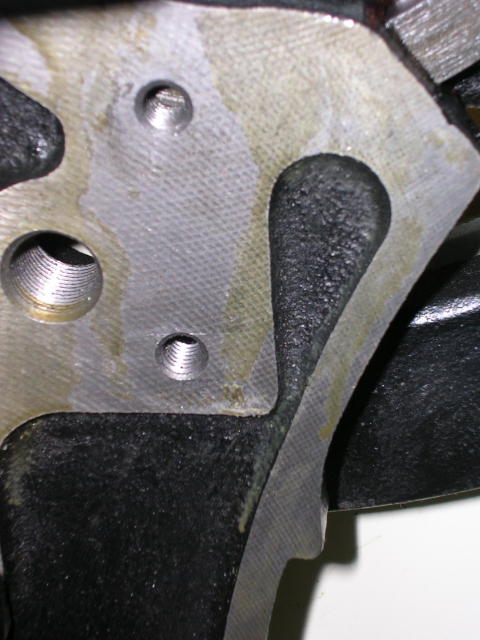
 The
next step is to install the bracket in place of the OEM one. The bracket
gets installed in the same two holes as the OEM splitter (left). Use the
supplied screws to install the splitter but don't tighten them up all the way
yet. Install your blade. Now use a straight edge to align the
splitter up with the right side of the blade. Tighten the screws when
aligned.
The
next step is to install the bracket in place of the OEM one. The bracket
gets installed in the same two holes as the OEM splitter (left). Use the
supplied screws to install the splitter but don't tighten them up all the way
yet. Install your blade. Now use a straight edge to align the
splitter up with the right side of the blade. Tighten the screws when
aligned.
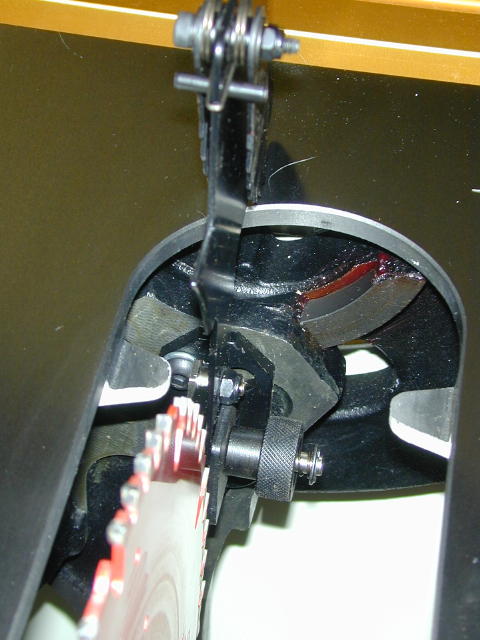
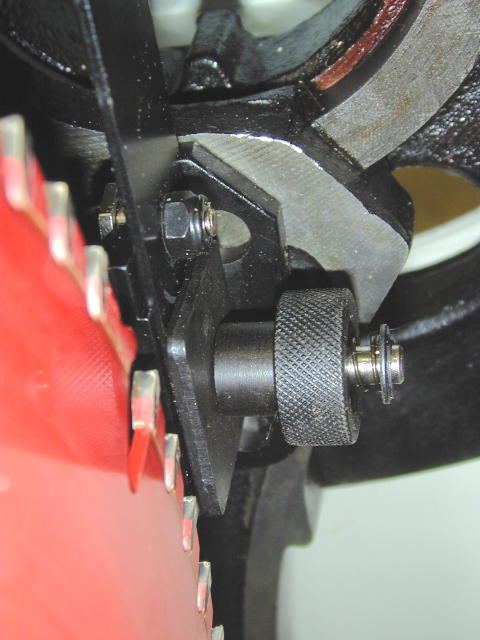
Your splitter should now be aligned with the blade and easily installed and removed by simply twisting the knurled knob.
I like the Biesemeyer splitter better but it is $100 more and this one works well enough.
Hope this was helpful. Please always use a guard and a splitter.
back to Bill-e's
Woodworking Page