DIY Skimmer Box for the
Red Sea Prizm
by
Bill Esposito
bill-e
One of the first things I noticed when I hooked up my Prizm skimmer was that I couldn't
get much flow out of it without lots of micro bubbles. Since my tank is 13"x13",
even the smallest amount of bubbles is alot, and not good for seahorses. With the
low flow, I also notices that the surface of the water was getting particle buildup,
and since the skimmer was drawing water from about 8" down, there was also
no surface skimming. These observations are compounded by the fact that this is
a seahorse tank, and by design, will not have alot of flow. I thought I could make
a skimming adapter for the Prizm, and below is what I ended up doing.
Materials:
1 ea. 3.5" floppy disk hard plastic case (the one that you get when you buy
10 disks)
2 ea. small plastic tie wraps. ( or one larger one)
Super glue Gel
1 ea. 3.5"x1/2" plastic strip (to be used to seal the box)
Table saw (perferred) or a circular saw or hobby saw
Hand held hobby saw (perferred) or a hack saw
1 ea. 1" piece of duct or masking tape
Assembly:
First, modify the plastic box to make slots where the water can pass through. Using
a table saw, adjust the blade so it extends 1/2". Next, disassemble the box.
Using the table saw, cut grooves from front to back in the top of the box. Be careful
as the plastic is brittle and can easily shatter and ruin the box. You could try
first taping the box with duct tape to add some strength. Once all the slots are
cut, take a hobby hand saw and gently cut off the very top of the box.
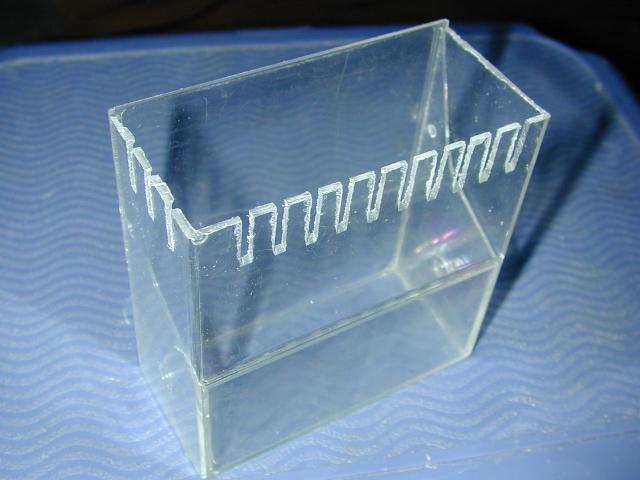
Here's the assembled box. In my version I only cut slots in the front and on one
side. If I had it to do over, I would cut the slots as described above, on the front
and back, and not bother with the sides.
The next step is to make sure your tank is topped off at your "full" level.
Take a piece of tape and place it on the Prizm's intake tube to mark the water level
position. Once that's done, remove the skimmer from the tank.
The only modification to the skimmer is that we have to shorten the intake siphon.
Using the tape you put on the siphon tube as a guide, line up the skimmer box you
just made so that the top is slightly higher than the tape. Now mark the siphon
tube where you will cut it. Give yourself about 1/2" of space between the newly
cut tube and the bottom of the skimmer box.
If you want, and I will make this modification when I clean it the next time, cut
the tube short enough so that you can get the strainer back on (you will have to
remove the little tabs in the strainer for it to fit). Without the strainer, much
more water is drawn in. So to allow for your valve setting to remain the same, you
should put the siphon on...not to mention the safety of anything that might climb
in. Cut the siphon tube carefully with a hobby hand saw. If you ever want to revert
back to the original configuration, you can connect the two siphon pieces back together
with a piece of plastic tubing.
Once the siphon is cut, mount the siphon box as it would be if it was attached,
lining it up with the tape, and butting it against the Prizm's output. Now take
a pencil or something and mark along each side of the siphon tune on the back of
the skimmer box. This is to allow you to know where to drill two holes, which you
pass the tie wraps through, to secure the box to the siphon
In this picture, you can see the box already assembled to the Prizm, and aligned
with the tape. The box was marked and the holes for the tie wraps drilled, The tie
wraps were then passed through the holes, and looped around the siphon and chinched
tight.
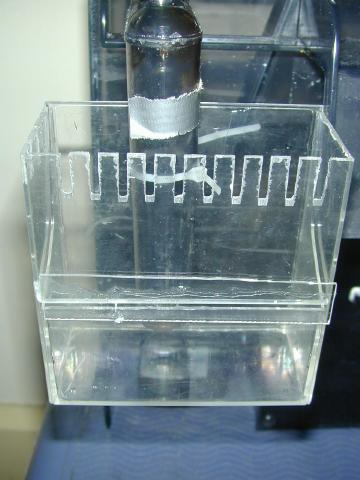
In the picture above, you also notice that I glued a thin piece of plastic over
the opening in the box. Your may or may not need this, or you can seal it with aquarium
silicone or the like.
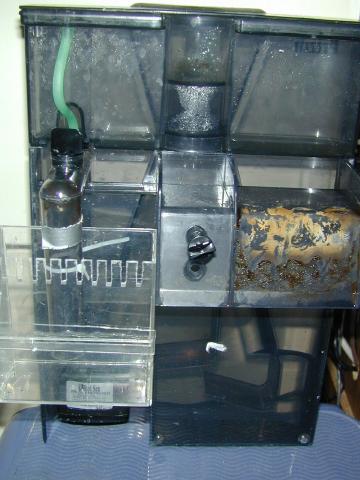
Lastly, secure the box to the siphon a and put the Prizm back in the tank...you're
all finished.
The finish product below.
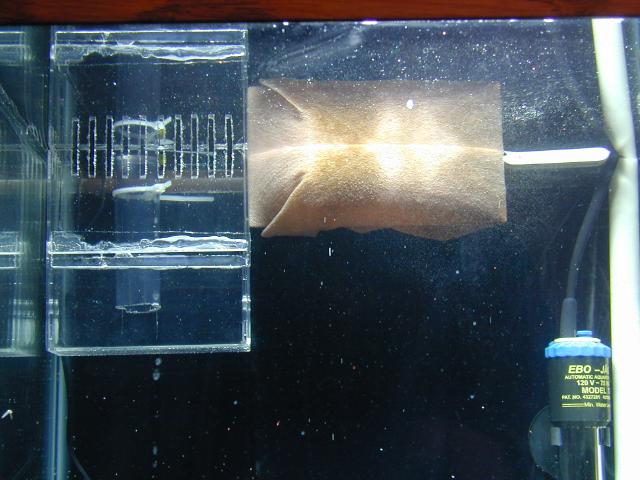
Below is a view looking through the tank. The nylon stocking on the output cuts
down on the bubbles.
[ Top | Home
Page | Faq ]
Most recent revision: May 06, 2001
Copyright © 2001 , Bill Esposito.
All Rights Reserved.
E-MAIL: Bill Esposito
 This page
has been built with HomePage Publisher.
This page
has been built with HomePage Publisher.